

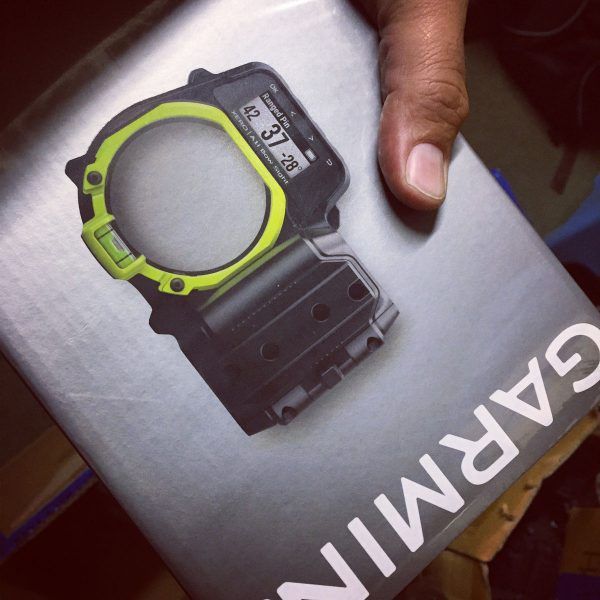
Its been a while since the Garmin Bowsight/Rangefinder has been announced in the beginning of the year, and the first units are now out in the wild and actively being used on hunts. I have set up 5 or 6 of these units for customers, specifically for hunting, so I will share what I have learnt so far, both good and bad.
I will start off by saying: When it was launched, I couldn’t see myself liking this sight. I thought it will be plasticky (but it’s Garmin, so there was some hope) I thought it would be gimmicky, I thought it would be heavy and I thought it would be clumsy. I was wrong… and I changed my opinion 100%
 What is it?
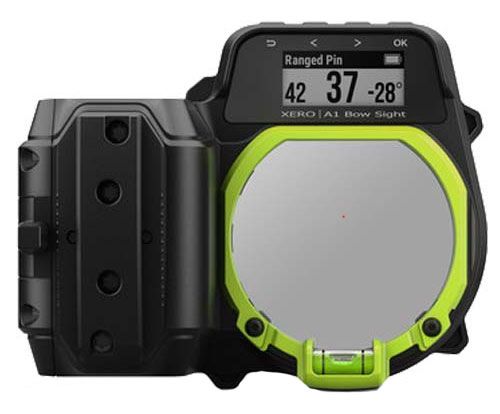
The Garmin A1 and A1i is a combination bow sight and rangefinder. This in itself, is not new. There are a few sight/rangefinder combination units on the market already. What makes this one different is that it creates a single or multi-pin sight on the specific required distance inside a HUD display (essentially a piece of glass in the middle of the sight housing)
Many people feel that this is “cheating” and makes hunting “too easy” but the fact remains that if you can’t shoot… you can’t shoot. All this sight does is to be more accurate and remove the maximum amount of guesswork from any given shot.
Setting one up
This is actually a lot simpler than it seems at first. Once you have you batteries installed (They must be lithium! anything else just cannot sustain the current drawn and gives a low battery warning within half a day!) and you switch it on, It starts prompting you for action and information. What language, what unit of measure, etc. and then it want you to get shooting.
Initially we were doing a “more or less” approach to getting it right, but the more time you take here, the better.
Critical is to get the second and third axis sorted. Target archers knows exactly why this is critical, but the average hunter often couldn’t care less. Here, it’s a problem if it’s not exact, because your rangefinder might not be looking at the same thing you are.
PRO TIP: Set your reticle (green circle) and pin (red dot) as bright as it can go during the setup process.
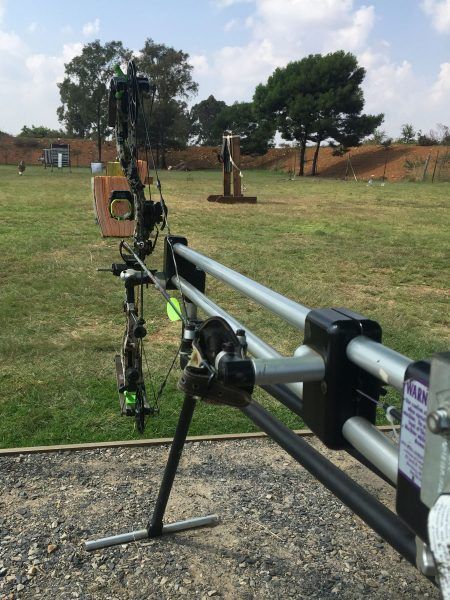
We started by getting them more or less aligned in a hooter shooter on full draw, but you will always need to do this manually on the hand of the shooter. The super nice thing Garmin did here was that all around the circle (or doughnut) are little green arrows telling you exactly where to move the head to.
PRO TIP: One arrow more or less equates to 1 line on the sight markings on the axis adjustments
Once it is set, you can start setting the rest of your distances.
The first one you actually move the sight up and down just like you would a regular old bow sight. That first marker becomes your “anchor” after which, the adjustments are all digital. If you shoot a shot, the sight will ask you if it was high or low, then by how much, and you simply adjust according to your measurement. Afterwards you shoot a check shot. If its spot on, you continue to the next distance.
The unit can work out everything it needs after 3 shots, but I suggest you continue shooting in 10yd increments as far as you can. Why? Because the furthest “fixed” pin you can create later is the furthest point you had an actual measurement. Also, because we suspect it gets more accurate with more data points (especially as you grow the distances) You do not have to shoot every distance exactly, you can choose the distances you want after the fact, but the longest pin cannot be more than your longest measurement.
In Use
Once it is set up, it is pretty darn accurate! Basically It does what it says on the box!
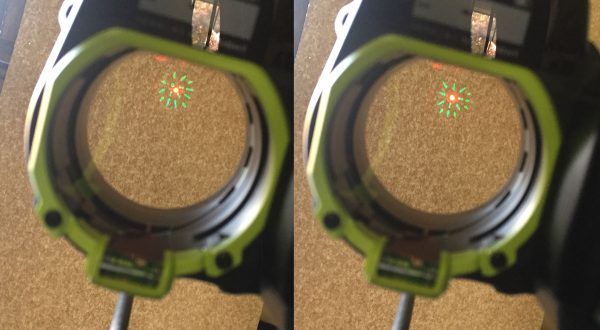
Tap and hold for about a second, and your distance (actual and shot distance – It does an angle calculation for you) pops onto the LCD screen and your pin goes live in the HUD. Tap the button again, and the single pin swops out for your fixed pins you set up earlier. Tap again, and you are back.
PRO TIP: if you are a five pin shooter and do not want to range and shoot, but want the comfort of your pins, you can set your custom pin distances to match specific marking like: 17yds to the tree, 23yds to the patch of grass, 34yds to the path, etc, instead of 20, 30, 40, 50yds. I doubt you will use it often, but it can be done!
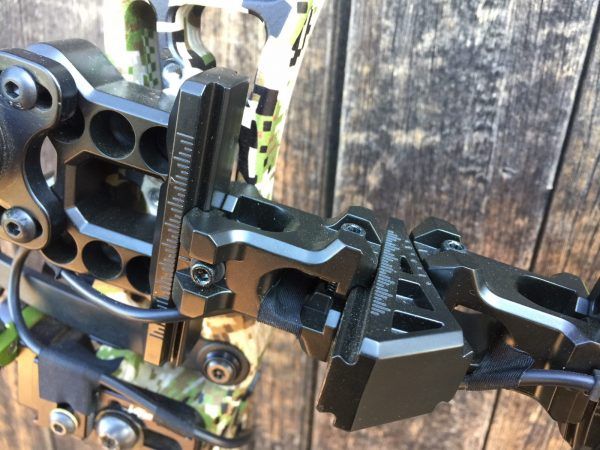
What is very nice is that on the A1i model, you can run a few different arrow setups. So if you have a heavy, Big Game arrow, you can set that up, but also your fast, mid-weight, plains game arrow, etc, etc, and simply switch between the profiles according to what you need on the day.
It is accurate, it is clear, and it is quite a bit lighter than I first thought it would be.
I haven’t dropped one, so I can’t tell you how robust it is, but I think it’s pretty tough and others have commented the same. It’s weather sealed so rain and moisture shouldn’t be a problem.
One thing that seems to be a bug is that although the A1 model can’t show green pins, it still gives you the option to set one of your fixed pins to green, instead of red. All that happens then is that you have a gap where the pin is supposed to be. It’s a bug and will surely be fixed!
And then, one thing that I didn’t like was that once you have done your calibration, you can’t return to it and refine or add extra distances. You have to start from scratch. Although, it won’t take so long because all the manual configuration has been done (also… it seems the sight has “learnt” from the previous setup… maybe its just an illusion, but adjustments seem smaller) But if you quit at 50yds, and then decide you want to add 60, 70 and 80yds… you are out of luck. we start right from 10!
To counter that… What I really did like is that the sight seems to have a narrower field of view when measuring distance than a standard rangefinder, so it seems to not be caught out by branches and grasses between you and the target. It has about half the range of a basic, off the shelf rangefinder… which is plenty for a bow (and I suspect, why they could shrink the package)
What can go Wrong?
Well, The Batteries can die on your trip. If you used the Lithium batteries, this really shouldn’t happen, but if it does, simply undo the lid, and replace the batteries (AAA size) the sight will remember all the settings! Excellent design point: The bolts holding the cover in place cannot unscrew from the cover, so you can’t drop a bolt, and the lid is attached to the trigger mechanism, so you can’d drop the lid! Thumbs Up!
Its electronics, and electronics can fail or pic up bugs – firmware updates, do them.
We found a few people complaining that the sight distance measured is out by 1 yard. Doesn’t really make much of a difference but then we figured what is happening. They are checking with a manual rangefinder where they stand, but the bow measures from an outstretched arm. Fun fact: A Garmin Tech can calibrate an adjustment should you ever require it.
If you shoot under pressure and torque your bow, your distance can be way off. Obviously… your sight is pointing past the target. Also a reason why its critical to set the alignment (2nd and 3rd axis) up on the shooter’s hand.
The HUD screen can get grunged up with dirt or water. Time will tell how we sort this one… but it hasn’t come up yet.
Your Bank Manager says “no” or your wife says “hell no!” – sorry, there is no firmware update for that! I can suggest a foot rub and some flowers… for the wife, not the bank manager…
Conclusion
If you have the budget, get one… you will probably enjoy it and be the envy of your friends. It’s expensive, sure… but in shooting sports, it’s still actually quite reasonable. Of course you can get a sight for $30 and measure by walking up and down the field or guestimating… this sight is not for you.
However, if you like stalking, and hunting skittish game that moves around allot, the speed at which you can get an accurate distance AND pin is just astounding! It is a game changer. And THAT is the gist of it.
Garmin tried to add extra features like the GPS and metrics on your shot, etc… those are nice, but I think its for a more American market. In Africa, if you shot an animal and didn’t get it within an hour or two, chances are better than good that a scavenger or predator has your meat. Coming back tomorrow to the exact point is probably not going to be helpful… although taking yourself to the last known spotted position could be quite handy.
I am not saying we won’t feel the benefit of it, but it will be much less. That said, the A1i model integrates with your Garmin Fenix5 (and up) watch, so various new app implementations are possible from developers in the future.
As I mentioned before. I changed my mind. This is definitely a sight to put on your wish list. I can almost guarantee that you will like shooting it!
![]() Thank you very much to Archer’s Edge for letting us play with the Garmin sights! If you want to see and feel them first hand (both models as well as the watches and 360 camera) then please give them a shout!
Thank you very much to Archer’s Edge for letting us play with the Garmin sights! If you want to see and feel them first hand (both models as well as the watches and 360 camera) then please give them a shout!